Wednesday, 25 July 2012

Simple Pastel Makeup Look

Hello everyone! Recently I created a makeup look based around a few of my favourite pastel colours and thought that it would interesting to share. Pastel colours are great for summer and for those who enjoy colour, so what better way than to incorporate these into a makeup look! 

For this look I used minimal products and focused on the Mediterranean eyeshadow palette by Sleek.


1.) After applying foundation, concealer & powder as your base, select your eyeshadow to begin the eyes (my main pastel colours include a mint green and lilac.)
2.) Begin by applying the mint green to the inner half of the eye up until the eye crease.
3.) Select a shimmery lilac and place the eyeshadow onto the outer half of the lid, making sure you carefully blend the two colours with a fluffy brush. Also use the fluffy brush to blend the edges of the eyeshadow to soften the edges of colour.
4.) In order to create greater depth, apply more of the lilac colour into the eye crease as this will provide the illusion of deeper sockets and a more interesting look. After that apply your favourite black eye liner to neaten the look and create contrast.
5.) Next apply your favourite mascara, select a rosy pink blush and add a pink lip. You can also fill in your brows to neaten up the overall look and frame your face.

I hope that you enjoyed this simple tutorial :) What pastel colours are your favourite? 
Rachel
xxx


Sunday, 8 July 2012

DIY Purple Ombre Shorts

Hey everyone! I've recently become very interested in the ombre dip dye trend and once I came across a few images on the internet of some ombre shorts, I had to have a go creating my own! I've also seen dip dye shorts in many shops such as Miss Selfridge and Topshop at a price averaging £30, so this DIY will certainly save you some money!

What you need for this DIY:- 
  • An old pair of jeans which you are willing to cut up.
  • Scissors
  • A pen/chalk (to mark where you wish to cut - optional.)
  • Tongs (these help with the fraying of the shorts and creates fraying quicker.)
  • Bleach (cheap standard bleach.)
  • Bucket
  • Fabric dye in colour of choice.
  • Old toothbrush (which will be used to help create that graduation of colour.
  • Rubber gloves
  • Salt (roughly 250g.)
 Step 1
First of all, try on your jeans and decide how short you would like them. With a pen/chalk mark out a rough guideline (at the front of the jeans mark out where you would like at a slight diagonal going up towards the outer edge of the jeans, mark the back with a slight rounded edge, lower than the front.) Begin cutting with a pair of strong scissors, always cut a bit lower than what you want exactly as this gives you a chance to try on the jeans again and make amendments!

Step 2
After you are happy with the length of your shorts, begin the fraying! I decided to use some BBQ tongs as it's a lot quicker than using your hands/tweezers. Basically clamp onto the material and pull quite hard (not too hard - you don't want to rip the material... unless you want to.) Carry on fraying the edges until you are satisfied with your distressed look.
 
If you want to increase the distressed effect, you can create holes in your shorts by carefully pinching the material and snipping using the scissors. When creating a hole near the pocket area, make sure not to cut into the pocket! Fray the holes using the previous technique.

Step 3
Bleach, Bleach, Bleach! For my shorts I soaked them in an old bucket with a mixture of bleach and about a litre or two of water. As I had never done this before, it was a bit of trial and error, but I left them overnight and rinsed them in cold water at around 5pm the following day.

Step 4
Now time for the dye! For my DIY I chose to use "Dylon Fabric Dye" in the colour "Intense Violet." Once your recently bleached shorts are rinsed, lay them out on a flat surface whilst you prepare the dye in your bucket. 

At this point, follow the instructions according to your dye. I had to add 500ml of warm water to my bucket, along with salt. (To be honest I estimated the salt proportions, but I think the general idea of the salt is to help make the colour sink into the fabric and make the colour more vibrant.  
 
To begin the ombre effect, pour a small amount of dye into the salt, water combo and mix. Once mixed place your entire shorts into the solution for a short period of time (keep looking and pull them out once you are satisfied - mine were a very pale lilac.) 
 
Step 5 
 To create a deeper purple, add a greater amount of powder dye to the bucket, along with some salt. Place your shorts into the solution making sure to hold onto your shorts tight in the bucket. To help soften the graduation of colour get your old toothbrush and brush along where the shorts are entering the solution (this will prevent a harsh line.) Keep shorts in for a longer period than before, but always keep checking!
 
Step 6    
Keep repeating this process further down the shorts, by increasing the amount of dye and adding more salt. 
  
Step 7
Once you're happy with the ombre effect, hang them outside to dry completely. Within the first few weeks, when you need to wash them I recommend washing them separately in case of the dye coming out of the fabric and onto your other clothes. 
 
Hope you enjoyed this DIY tutorial, I would appreciate any comments or criticism and would love to see your outcomes if you try this! :D 
 
Rachel xxx  


Sunday, 24 June 2012

Ombre Sparkle Nails

As my nails were in desperate need to be painted, I took the opportunity to experiment with a different technique, in comparison to my usual bog-standard one colour coat.

As the ombre "dip-dye" effect is very popular at the moment, I thought I would try creating this look on my nails!

For this particular nail look I combined three colours which were different shades within a colour group. I chose to keep the brighter shade at the bottom of the nail and decided to gradually get darker towards the top! 
 
In order to add more drama, I added a glitter top to the very ends of the nails.
 
 Products used:- Base coat; Sally Hansen Double Duty Base & Top Coat, Lightest shade; Cheeky Chops 240 by N07, Middle shade; OMP! by Nails Inc, Darkest shade; (random nail polish,) Glitter colour; Excuse Moi! OPI Muppets Collection.
You will also need a small sponge, or an old make up applicator that you have lying around (what I used.)
  • Step 1 - Apply base coat to protect nails from staining.
  • Step 2 - Apply an even opaque coat of the lightest polish.
  • Step 3 - Once nails are completely dry, use your mini sponge to lightly dab on the middle colour to the top half of your nails.
  • Step 4 - Once nails are completely dry again, dab on the darkest shade to the very tops of your nails, making sure there's a gradual ombre effect.
  • Step 5 (optional) - If you want to add extra drama to your nails apply a glitter polish in the same way previously to the very tips of your nails.
  • Step 6 - Tidy up where necessary by applying more polish to improve the effect.
  • Final step - Apply a top coat in order to seal in your design to prevent it from chipping and to create a shiny finish. 
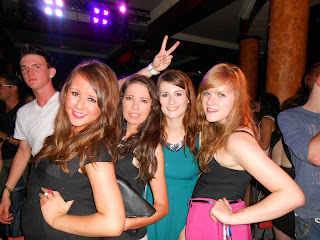
    Hope you enjoyed! Here's a few snaps of when I went out the other night to celebrate my friends birthday! Make up wise I chose to create a teal smokey look.
    (Fab night out, excuse the weirdo in the pic haha!)

Wednesday, 20 June 2012

Tropical Colour Pop!

Hey everyone! 

As the sun has started to peak out amongst the clouds, I chose to experiment with some bright colourful eye shadows inspired solely from one of my summer tops.


 (The top I was inspired from)

(For this look all colours used were from the "Sleek - Mediterranean Palette.") 
  • Begin by applying your chosen moisturiser, primer (optional), foundation and concealer as your base.
  • Eyes - I started by applying a lime green eyeshadow to the first third of the lid.
  • I then blended into the eye crease lightly an orange eye shadow, making sure the edges appeared soft.
  • To add dramatic definition I then applied a hot pink eyeshadow to outer corners of the eye, and blended well into the orange and parts of the green.
  • To darken the lower lash line slightly I added a purple eyeshadow and also blended some of this into the pink on the outer corner to create even more depth. 
  • To finish the eye look I added a matte cream colour to my brow bone, to help brighten the area and also neaten the eyeshadow edges.


  • Next I chose to line my top lash line with a liquid eyeliner and darkened the bottom lash line slightly with an eyeliner pencil.
  • To help frame my face I then filled in my brows with "Benefits - Brow Zings."
  • To finish off I applied mascara, patted on a pink cream blusher and added some coral gloss to the lips.
  Hope you enjoyed :}
xxx

Monday, 28 May 2012

Golden Shimmer

Hello everyone!


The weather recently over the last week has been absolutely gorgeous, allowing the ability to sunbathe in your garden and also go to the beach with your friends and have plenty of delicious BBQ feasts! Yum!

This is the view from where I'm sitting at the moment whilst writing this post, and straight afterwards I plan to bask in the sun and paint my nails :}


With Summer practically here, I enjoy experimenting with brighter colours and gorgeous shimmers across the eye with coral glosses and daring shades of lipstick. Today I chose to have a shimmery gold and green eye look with a pearly shade to highlight my inner corner and a dark brown to line my upper lash line. I chose to finish the look with coral lips (using my favourite coral lipgloss - spiked punch by Benefit) and lightly dusted coral cheeks. 


Hope you enjoyed & happy sunbathing :} 

Wednesday, 11 April 2012

Fuchsia Crush

Hello everybody!
Seems as I'm totally obsessed with watching and reading other people's make up tutorials, I decided to have a go and attempt my own look for some fun.


Finished look: A basic smokey eye, paired with a bright hot pink lip.
  Products: Bourjois bronzing powder, Metallic grey eyeshadow by Fearne, Maybelline Colour Tattoo eyeshadow in Tough as TaupeNo.7 Face Powder in Candlelight, Benefit Pink highlight eyeshadow and Deep charcoal eyeshadow, Collection 2000 Concealer in Fair, Benefit Hello Flawless Foundation in Ivory and Oilatum Natural Repair Face Cream.


 Before beginning the look after cleansing, apply a layer of your favourite moisturiser, (I chose to use Oilatum Natural Repair face cream.)
 
Step 1: Apply Concealer to necessary areas (under the eyes or on any blemishes) - Collection 2000 in Fair.
 Step 2: Apply Foundation to even out skin tone and create a blank canvas. (Apologies for the position of the image.) - Benefit Hello Flawless Foundation in Ivory.

 Step 3: Apply cream eyeshadow all over the lids (Maybelline Colour Tattoo in Tough as Taupe.) With an eyeshadow brush press loose metallic grey eye onto lids to intensify the impact. With a blending brush place a deeper grey eyeshadow into the eye crease to create depth.
 Step 4: Apply a matching eyeshadow according to your brows or cream brow product. (I chose Benefit's Brow Zings in shade light.) This adds structure to the brows to frame the overall look, as well as your face.
 Step 5: Apply a bright pink lip product to your lips, this completes the look and makes the overall make up look POP!

Hope you enjoyed!
xxx


Monday, 9 April 2012

Futuristic Shimmer

Hey all!
Today has been a gloomy old day I have to be honest. There hasn't been a minute throughout today where it actually hasn't rained, which definitely ended up dampening my overall mood. Over a lot of deliberation deciding what to do with the day, I ended up having a lazy day with my boyfriend watching the film 'Insidious' and eating lots of food. 
However last night I decided to paint my nails using the beautiful metallic silver shade from the OPI Muppets Collection called 'Designer... de Better!' It's such a pretty nail polish as it contains very fine pink and silver shimmer, which adds some dimension compared to ordinary silver metallic polishes.


In order to protect my nails I decided to use Sally Hansen Hard As Nails as a base coat, and then applied 2-3 coats of the OPI Designer... de Better! in order to build up an opaque base colour to create a greater impact. I then topped the look off with another application of the Sally Hansen Hard As Nails to seal the look. According to my boyfriend my nails appear 'futuristic,' hence the title ;)

Hope you enjoyed, and I'll be posting again soon! xxx